Vintage Doily Glass Panel Art
Materials
-
Two glass panels (any size you prefer, such as 11 × 14 inches)
-
Vintage doilies (various sizes and shapes)
-
Glass cleaner
-
Microfiber cloth
-
Invisible tape or light spray adhesive
-
Picture frame clips or glass panel clips
-
Hanging hardware (optional)
Directions
-
Clean both glass panels thoroughly with glass cleaner and a microfiber cloth to remove dust and fingerprints.
-
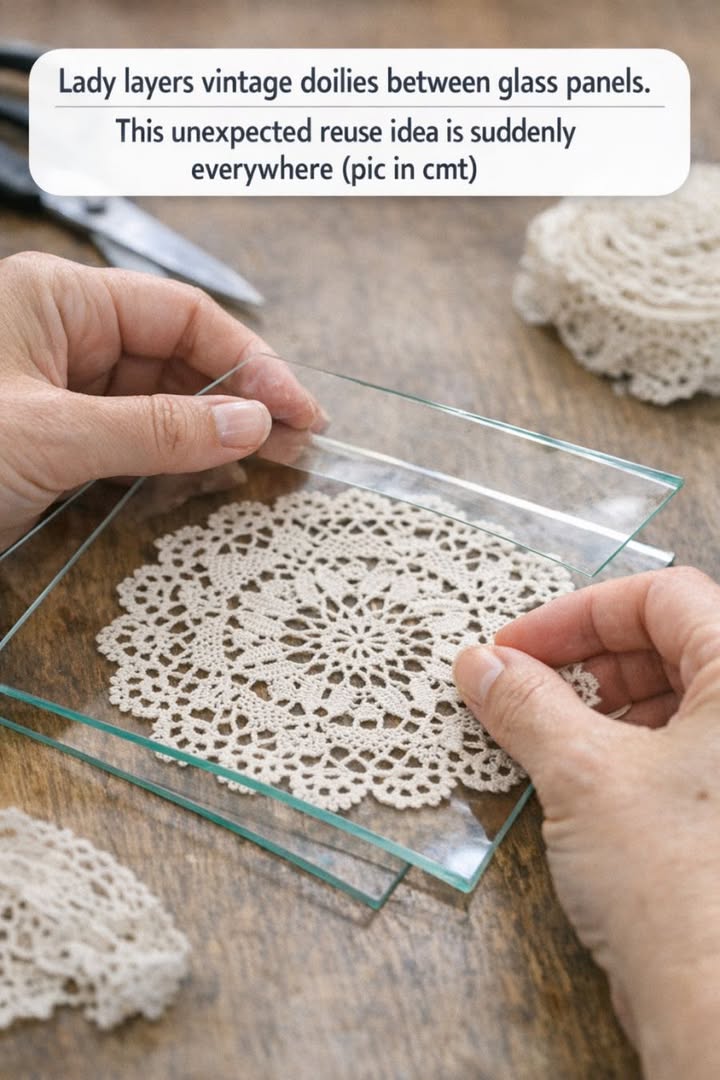
Arrange the vintage doilies on one glass panel, experimenting with placement until you love the layout. Layer smaller doilies over larger ones for depth.
-
Once satisfied, gently secure the doilies using invisible tape or a light spray adhesive that won’t damage the fabric.
-
Carefully place the second glass panel on top, aligning it with the bottom panel.
-
Secure the panels together using picture frame clips or glass panel clips.
-
If hanging the piece, attach appropriate hardware to the back. Otherwise, display it on a stand or lean it against a wall.
-
Place your finished artwork where it can truly shine.
Variations & Tips
-
Soft color accents: Lightly dye select doilies in pastel tones to create a subtle ombré effect.
-
Texture play: Mix crocheted, embroidered, and lace doilies for a richer visual experience.
-
Modern twist: Add pressed flowers or leaves between the glass layers alongside the doilies.
-
Statement scale: Use oversized glass panels for a bold focal point or create a series of smaller panels for a cohesive collection.
-
Light matters: Position near a window or soft light source to enhance the lace details.